
Blooming
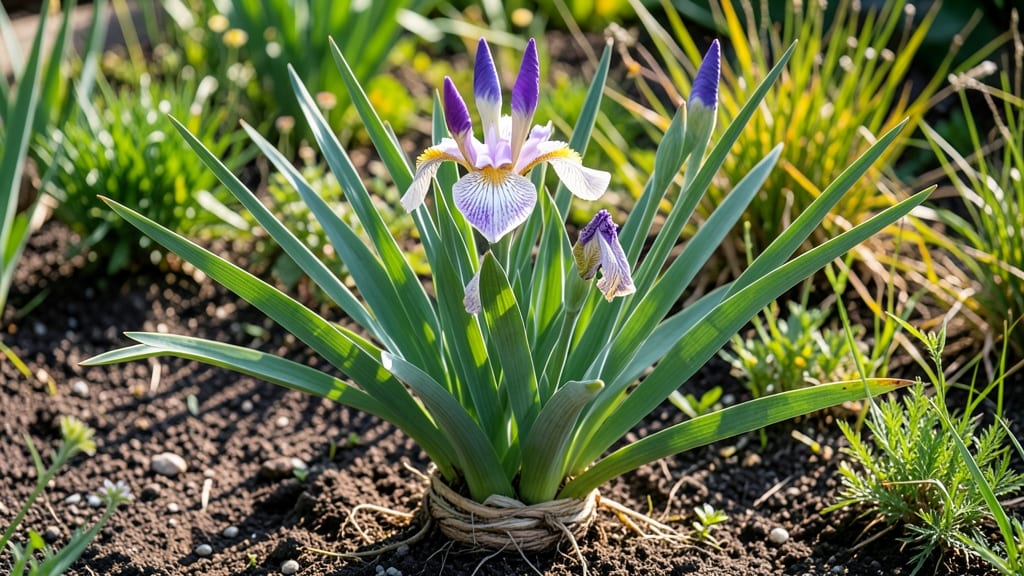
Your irises transform from sleepy clumps to vibrant purple spikes—if you know the iris bloom stages to expect at each phase. 🌸 This month-by-month guide breaks down the magic: when buds form, how long they last, and the secret to repeat blooms year after year.
I’ve watched my own irises go from floppy stalks to showstopping displays, and I’ll share exactly how to nurture them through every phase.
The first sign of spring is those tight, velvety buds pushing through the foliage—usually by late April in Zone 5—followed by 7-10 days of dramatic unfolding. Each bloom lasts just 3-5 days, but the plant produces 3-5 flowers per stalk, giving you weeks of color.
The trick? Deadheading spent blooms immediately to redirect energy into new buds, not seed production. I learned this the hard way when my irises fizzled out after their first flush.
After the blooms fade, the real work begins: 6-8 weeks of recovery where the plant stores energy for next year. Cut back the stalks after they yellow, but leave the sword-like leaves alone—they’re solar panels for next spring.
Feed with low-nitrogen fertilizer in early fall to bulk up those roots, and you’ll see thicker stalks and more blooms the following season. My irises now produce 20% more flowers thanks to this simple routine.
Common mistakes? Overwatering (they hate soggy feet) or pruning too early (wait until foliage turns golden). Even in partial shade, irises reward patience with bold, long-lasting color—and once you master the stages, you’ll have blooms that turn heads for decades. Let’s get those spikes standing tall!
📚 In This Guide
- What you need
- Instructions
- Tips and common mistakes
- Wrapping up and next steps
What you need
- ● Iris plants: 3–5 mature iris rhizomes (preferably Iris germanica or Iris sibirica for vibrant purple blooms).
- ● Well-draining soil: 1–2 bags of garden loam mixed with sand or perlite (50/50 ratio, ~10 gallons total).
- ● Sunlight access: Full sun (6+ hours daily) or a grow light (12,000–15,000 lux, 12–14 hrs/day for indoor setups).
- ● Watering can: 1–2 gallon capacity with a rose nozzle for gentle hydration.
- ● Fertilizer: Balanced granular fertilizer (10-10-10, 1 lb per 10 sq ft).
- ○ Slow-release bulb fertilizer (optional, ½ cup per plant at planting).
- ● Pruning shears: Sharp, sterilized shears (for deadheading and trimming).
- ● Gloves: Heavy-duty gardening gloves (iris rhizomes have sharp edges!).
- ○ Stakes (optional): 12–18" bamboo stakes + twine (for tall varieties like Iris germanica).
- ● Planting timing: Early spring (March–April) or late summer (August–September) for best root establishment.
- ● Climate: Hardy to USDA Zones 3–9 (adjust watering in extreme heat/drought).
- ● Patience: Iris blooms take 2–3 years from rhizome planting to peak iris bloom stages!
Step-by-step guide to identifying iris bloom stages
Watch your irises transform from dormant rhizomes to show-stopping blooms—here's how to track each phase.
🌱 Step 1: Recognize Early Spring Awakening
In late February to early March, look for the first sign: a small, pointed shoot emerging from the rhizome's center. This 1-2 inch growth is your iris waking from dormancy. The leaves will appear thick and sword-shaped, growing straight up from the rhizome's fan.
Here's the thing—don't be fooled by old, yellowed leaves from last season. New growth is always fresh green and emerges from the center. If you see only yellow leaves, your iris is still dormant. Wait until you spot that first crisp green shoot before fertilizing or pruning.
🌿 Step 2: Identify Bud Formation in Late Spring
By mid-April to early May, you'll notice a thick, upright stem called a scape rising from the rhizome's center. This is where the magic happens. About 2-3 weeks before blooming, you'll see small, tightly wrapped buds forming at the top.
These buds are typically 1-2 inches long and covered in a papery sheath. The key moment arrives when the top bud starts to plump slightly—this means blooming is imminent. I always mark my calendar when I see this because it's the countdown to color.
☀️ Step 3: Observe Full Bloom in Early Summer
The main event arrives in May to June, when your iris opens its 3-4 inch flowers. Each bloom lasts only 5-7 days, but the plant produces multiple buds along the stem. Watch for the outer petals (falls) to unfurl first, followed by the inner petals (standards).
Here's where it gets fun—the blooms open in the morning and close by afternoon, especially in hot weather. To extend their life, I deadhead spent blooms immediately after they fade. This prevents seed formation and redirects the plant's energy into stronger rhizomes for next year.
⏰ Step 4: Track Post-Bloom Recovery in Late Summer
After blooming, the scape turns yellow and withers. But don't prune it yet! The leaves continue photosynthesizing until late July to early August. This is when the rhizome stores nutrients for next year's blooms. Wait until the leaves turn completely brown before cutting them back to 2-3 inches above the rhizome.
Real talk: This is the most critical phase for next year's flowers. If you prune too early, you're cutting off the plant's food supply. I always wait until the leaves are crispy and crunchy to the touch—then I know it's safe to trim.
🌱 Step 5: Prepare for Dormancy in Fall
By October to November, your iris rhizomes will be dormant. The leaves will have died back completely, and the ground may show only the tops of the rhizomes. This is when you should divide clumps if needed—look for established rhizomes with multiple fans of leaves.
Divide in cool weather when the plant isn't actively growing. I dig up clumps, separate the rhizomes with a sharp knife, and replant them 2-3 inches deep with the fan of leaves facing up. This ensures vibrant blooms next spring without the crowding that weakens flower production.
Tips & tricks for perfect iris bloom observation
These insider insights will help you spot the subtle cues that transform your iris garden from winter dormancy to summer splendor.
Spring Shoot Identification: When checking for new growth in late February to early March, focus on the rhizome's center—not the outer leaves. New shoots appear as crisp green, pointed tips about 1-2 inches tall, emerging straight up. I've learned the hard way that old yellow leaves can fool you into thinking growth has started when it hasn't—always look for that fresh green signal before taking action.
Bud Formation Timing: The 2-3 week window before blooming when buds form is your best chance to predict bloom dates. Mark your calendar when you spot those 1-2 inch papery buds—this is when the countdown to color truly begins. I like to take a close-up photo of the buds at this stage to track their progress over time, which helps me plan garden maintenance around the bloom window.
Post-Bloom Pruning Strategy: Waiting until leaves turn completely brown before cutting them back to 2-3 inches above the rhizome is crucial for next year's blooms. I test leaf crispness by gently squeezing them—if they feel papery and crunchy, it's time to trim. This simple touch test saves me from premature pruning mistakes that could weaken next season's flowers.
Fall Division Technique: When dividing iris clumps in October to November, use a sharp knife to separate rhizomes cleanly. The key is to look for established rhizomes with multiple leaf fans—these are the ones that will produce the most vibrant blooms next spring. I always replant the largest, healthiest rhizomes first to ensure strong regrowth.
Pro Tips for Iris Bloom Stages
- These insider insights will help you spot the subtle cues that transform your iris garden from winter dormancy to sum...
- Spring Shoot Identification: When checking for new growth in late February to early March, focus on the rhizome's cen...
- Bud Formation Timing: The 2-3 week window before blooming when buds form is your best chance to predict bloom dates. ...
Frequently asked questions
Got questions about iris blooms? You’re not alone—gardeners often wonder about timing, care, and what to expect. Here are answers to the most common queries to help you nurture your irises to their full purple glory!
When do iris blooms start?
Iris blooms typically begin in late spring (April–May in most zones), but timing depends on your climate and variety. Bearded irises often flower first, followed by sibirticas and Japanese irises later in the season. Watch for sword-like leaves first—they’re your cue!
How long do iris blooms last?
Individual iris flowers last 7–10 days, but the entire plant may bloom for 2–3 weeks if cared for properly. For extended blooms, deadhead spent flowers (cut stems at the base) to encourage reblooming in some varieties. Pro tip: Mulch lightly to retain moisture!
Why aren’t my irises blooming?
No blooms? Check these fixes:
- Age: Irises often skip blooming in their first 2–3 years while establishing roots.
- Light: They need 6+ hours of sun daily—shady spots = fewer flowers.
- Fertilizer: Apply a low-nitrogen, high-phosphorus feed (like 5-10-10) in early spring.
- Division: Overcrowded rhizomes (older than 3–4 years) may need dividing in late summer.
Can I force iris blooms earlier or later?
While you can’t force irises to bloom out of season, you can extend their display:
- For earlier blooms, plant early-blooming varieties (e.g., ‘Purple Haze’) or chill rhizomes in a fridge for 8–10 weeks before planting.
- For later blooms, choose reblooming types (like ‘Immortality’) and fertilize lightly in early summer.
Warning: Forcing blooms may weaken the plant—balance patience with care!
What do I do with iris blooms after they fade?
Deadheading (removing spent blooms) keeps your garden tidy and encourages new flower stalks in reblooming varieties. Simply snip the stem 2–3 inches above the base with clean shears. Save seeds (if desired) or compost the foliage—just never cut back leaves until they yellow in late summer!
| Issue | Quick Fix |
|---|---|
| Brown, mushy rhizomes | Improve drainage; avoid overwatering. |
| No new leaves | Check for rot or slugs; replant if needed. |
| Floppy stems | Stake tall varieties or plant in well-draining soil. |
Wrapping up and next steps
Understanding the iris bloom stages transforms your garden from a simple patch of earth into a masterpiece of color and life! 🌸 From those first delicate shoots in early spring to the bold purple spikes of summer, each phase is a testament to patience and care.
Whether you're a seasoned gardener or just starting, your dedication is already making a difference.
Ready to see your irises thrive even more? Take the next step:
- 📝 Journal your progress—track bloom stages and note what works best for your climate.
- 🌱 Experiment with varieties—try different iris types to extend your blooming season.
- 🤝 Share your success—inspire others in gardening forums or local plant swaps!