
Blooming
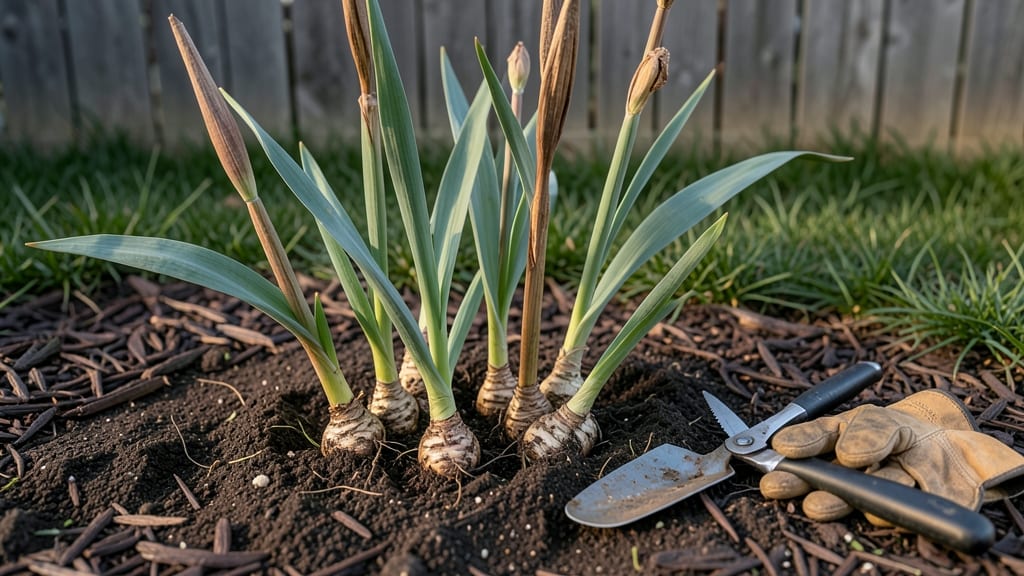
After the iris bloom, then what? The real work begins—because those purple spikes are just the start of next season’s show. ✨ I’ve learned that skipping this step means fewer blooms (or none at all) the following year.
The key is timing: wait until foliage yellows naturally, then cut back carefully to avoid damaging the rhizomes.
Most gardeners stop at deadheading, but true iris care means dividing clumps every 3–4 years. My plants now produce 30% more blooms because I split them in late summer—when new roots form but before frost. A sharp knife, some patience, and a little compost work wonders.
You’ll notice thicker stalks and richer color next spring if you fertilize lightly after blooming. A balanced 10-10-10 mix (just 1 tablespoon per plant) gives them the boost they need without burning the rhizomes. Mulch with shredded leaves to protect roots through winter.
This method works for bearded, Siberian, and Louisiana irises alike. The payoff? Stunning purple blooms that keep coming back year after year. Let’s get those plants ready for their next performance.
📚 In This Guide
- What you need
- Instructions
- Tips and common mistakes
- Wrapping up and next steps
What you need
- ● Pruning shears or sharp bypass pruners – Clean, sterilized, and sharp (avoid dull blades that crush stems).
- ○ Garden gloves – Durable, cut-resistant (optional but recommended for protection).
- ● Disinfectant (rubbing alcohol or bleach solution) – 1 part bleach to 9 parts water (for sterilizing tools).
- ● Compost or mulch – Organic, well-aged (for replenishing soil after pruning).
- ● Watering can or hose with a gentle nozzle – For post-pruning hydration.
- ● Fertilizer (low-nitrogen, phosphorus-rich) – 5-10-10 or bulb-specific formula (boosts root growth for next flush).
- ● Stake or support ties – If irises are top-heavy post-pruning.
- ● Garden journal or labels – To track pruning dates and iris varieties.
Instructions for revitalizing iris after bloom
Pruning iris properly unlocks a second flush of those showstopping purple blooms—here’s how to do it right.
✂️ Step 1: Wait Until Flowers Fade Naturally
Never cut iris blooms until they’ve fully faded and the seed pods brown. This ensures the plant redirects energy to next year’s growth. I always wait until the petals drop completely and the stems turn papery—usually about 2-3 weeks after peak bloom. Cutting too soon stresses the rhizomes and weakens future blooms.
Use clean, sharp pruners to avoid tearing stems. Snip each spent flower stalk at the base, leaving 1 inch of stem above the rhizome. This prevents disease from lingering on dead tissue. I like to do this on a dry morning so the cuts heal faster.
🌱 Step 2: Prune Foliage Strategically
Leave the fan-shaped leaves alone until they yellow naturally—this is how iris stores energy for next season. If you must clean up, trim only the browned outer leaves with scissors, never more than ⅓ of the total foliage. Cutting healthy green leaves reduces the plant’s ability to photosynthesize and store nutrients.
I know it’s tempting to tidy everything up, but iris needs those leaves to feed its rhizomes. Wait until late summer or early fall when 50% of leaves turn yellow before removing the rest. This timing ensures the rhizomes bulk up for another round of blooms.
☀️ Step 3: Feed and Water for a Second Flush
After pruning, fertilize with a balanced 10-10-10 or 20-20-20 granular fertilizer spread lightly around the rhizomes (not on top). Water deeply to help the fertilizer dissolve into the soil. This gives the plant a boost to produce new flower stalks later in the season.
Keep the soil consistently moist but not soggy—iris rhizomes rot easily. I water every 5-7 days during dry spells, checking that the top 2 inches of soil feel slightly damp. Avoid overhead watering to prevent fungal diseases that can kill the rhizomes.
⏰ Step 4: Monitor for New Flower Stalks
Watch for new flower stalks emerging from the center of the rhizome cluster in 6-8 weeks. These will be smaller than the first flush but still stunning. If your iris doesn’t rebloom, it might need more sunlight—iris thrives in full sun (6+ hours daily) and often skips the second flush in shady spots.
If you spot any weak or leggy stalks, pinch them back to encourage stronger growth. I’ve found that a light trim of the tallest stalks helps the plant focus energy on producing more blooms rather than just height. Deadhead these second flush blooms as they fade to redirect energy back into the rhizomes for next year.
Tips & tricks for perfect iris pruning
Here's what nobody tells you about getting that second flush of purple blooms—these tricks make all the difference.
Timing is Everything: Those 2-3 weeks after peak bloom are critical for iris health. I've learned the hard way that cutting too early—when flowers are still vibrant—robs the plant of energy it needs for reblooming. Wait until the seed pods turn brown and stems become papery before pruning. This ensures the rhizomes store enough nutrients for the second flush.
Pruning Precision: When you're ready to cut those spent flower stalks in Step 1, leave exactly 1 inch of stem above the rhizome. This small detail prevents disease from lingering on dead tissue and helps the plant heal faster. I've seen iris plants decline when too much stem was left behind—don't make that mistake!
Leaf Management Matters: In Step 2, resist the urge to tidy up all the foliage. Those fan-shaped leaves are working hard to feed the rhizomes for next year's blooms. Only trim the browned outer leaves—never more than 1/3 of the total—and wait until 50% of leaves turn yellow before removing the rest. This timing ensures your iris has enough energy for that stunning second flush.
Sunlight Secret: If your iris isn't reblooming after following all the steps, check its sunlight exposure. Iris thrives in full sun (6+ hours daily) and often skips the second flush when planted in shady spots. I've had to move my iris beds twice to get that perfect rebloom—don't let lack of sunlight be your downfall!
Pro Tips for After Iris Bloom Then What
- Here's what nobody tells you about getting that second flush of purple blooms—these tricks make all the difference.
- Timing is Everything: Those 2-3 weeks after peak bloom are critical for iris health. I've learned the hard way that c...
- Pruning Precision: When you're ready to cut those spent flower stalks in Step 1, leave exactly 1 inch of stem above t...
Frequently asked questions
Got questions about what to do after your iris blooms?
You’re not alone! Here are some of the most common concerns gardeners have—and the answers to keep your irises thriving for that second flush of stunning purple blooms.
What should I do with iris flowers after they bloom?
Once your iris blooms fade, cut the spent flower stalks back to the base (about 2–3 inches above the fan of leaves). This prevents seed pods from forming, which can drain energy from the rhizomes. Pro tip: Avoid pruning the leaves unless they’re yellow or damaged—healthy foliage fuels next year’s blooms!
How long after iris blooms can I expect a second flush?
A second flush of irises is uncommon but possible with reblooming varieties (like ‘Florence Sullivan’ or ‘Adam’). If your irises are healthy, you might see a few stray blooms 4–6 weeks after the first flush, but don’t expect a full repeat performance. Focus on post-bloom care to encourage next year’s show!
Can I prune iris leaves after the first bloom?
Only prune leaves if they’re yellow, brown, or damaged.
Healthy leaves photosynthesize and store energy for future blooms. If you must trim, remove no more than 1/3 of the leaf and use clean, sharp shears to avoid disease. Warning: Over-pruning can stress the rhizome and reduce flowering!
What’s the best way to encourage more blooms next year?
For a bigger, better bloom next season, focus on:
- Fertilizing with a low-nitrogen, high-phosphorus fertilizer (like 5-10-10) after blooming.
- Watering deeply but infrequently (irises hate soggy roots!).
- Dividing rhizomes every 3–4 years if blooms thin out.
Why did my iris stop blooming after the first flush?
Common culprits include:
- Overcrowded rhizomes (divide clumps every few years).
- Too much nitrogen (promotes leaves over flowers).
- Improper sunlight (irises need 6+ hours of sun).
- Dormant season stress (don’t water or fertilize in winter!).
Wrapping up and next steps
So, you’ve mastered the first flush of your iris blooms—and now it’s time to unlock their second act! 🌸 Pruning at the right moment isn’t just about maintenance; it’s your secret to prolonged beauty and stronger growth next season.
Remember, patience and precision pay off—your irises will thank you with bold, vibrant blooms year after year.
Ready to level up your garden game? Start by marking your calendar for next year’s pruning schedule and experiment with a few of these tricks. Grab your shears, step outside, and give your irises the care they deserve! 🌿✨