
Blooming
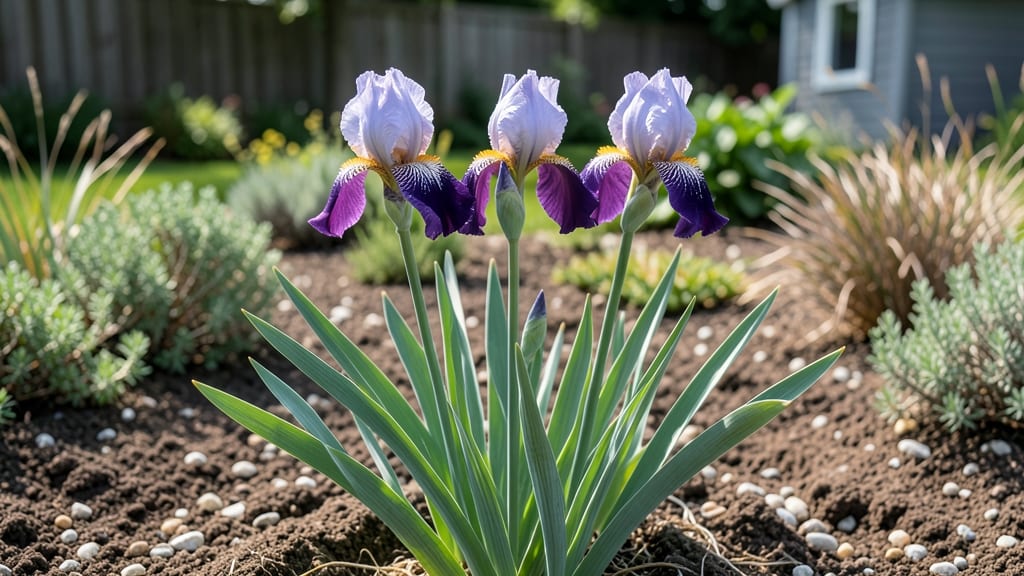
Iris flowers burst into color when most gardens are still asleep—iris bloom time varies wildly, but their cool-season magic starts as early as February in warm zones and stretches into June in cooler climates. 🌸 The key to timing is understanding your iris types: bearded irises (the classic showstoppers) bloom first, followed by Siberian irises with their delicate, later-season charm.
Your local climate dictates the exact window—Zone 5 gardeners might see blooms in May, while Zone 9 can enjoy them in February—but consistent moisture and well-draining soil keep them on schedule.
I've watched my own irises shift bloom times by weeks just by adjusting watering during heatwaves. The secret? Mulch to regulate soil temps and deadhead spent blooms to encourage reblooming.
What you'll end up with is a garden that feels like spring arrived early—bold purple, yellow, or white spikes rising above lush foliage. Bearded irises give you the classic dramatic look, while Siberian irises add a softer, later-season touch.
The payoff? A show that lasts longer than most annuals, with minimal effort after the first year.
Works for any garden style, from cottage borders to modern landscapes. Here's how to fine-tune your timing for maximum impact—no guesswork required.
📚 In This Guide
- What you need
- Instructions
- Tips and common mistakes
- Wrapping up and next steps
What you need
- ● Iris rhizomes or bulbs: Choose bearded or siberian varieties (e.g., Iris germanica or Iris sibirica). Quantity: 3–5 per square foot for a lush display.
- ○ Well-draining potting mix or garden soil: Amend with compost (1 part compost to 3 parts soil) for nutrients. Optional: Add perlite or sand (20–30%) for sandy soil.
- ● Organic fertilizer: Low-nitrogen, high-phosphorus blend (e.g., 5-10-10 or 3-4-6). Application: 1–2 tbsp per plant at planting time.
- ● Mulch: Pine bark or straw (2–3 inches thick) to retain moisture and regulate soil temp.
- ● Garden trowel or hand shovel (for digging holes 2x wider than the rhizome).
- ● Pruning shears (to trim dead foliage post-bloom).
- ○ Gloves (optional but recommended—iris rhizomes can be sharp!).
- ● Watering can or hose with a gentle nozzle (avoid overhead watering to prevent fungal issues).
- ○ pH test kit (optional): Irises thrive in slightly acidic to neutral soil (pH 6.0–7.0).
- ● Sunlight: Full sun (6+ hours/day) for optimal blooms. Partial shade (3–6 hours) works in hot climates.
- ● Climate timing: Plant rhizomes in early fall (6–8 weeks before first frost) or seeds in late summer for spring blooms.
- ● Drainage: Irises hate soggy roots—ensure no standing water after rain.
- ● Spacing: 12–24 inches apart (closer for dwarf varieties, wider for large clumps).
How to time iris blooms for stunning season-long color
Here’s how to coax irises into their peak bloom window—no guesswork, just reliable results.
🌱 Step 1: Plant Rhizomes at the Right Depth and Time
Irises thrive when planted in early fall, about 6-8 weeks before your first hard frost. This gives roots time to establish before winter dormancy. Dig a hole 3-4 inches deep—deeper than most gardeners bury them, since rhizomes need to sit half-exposed to sunlight and air.
Spread the rhizomes so the fans of leaves point outward, never upward. Planting them too deep suffocates the crown, while shallow planting invites rot. Water immediately after planting to settle the soil, but avoid soggy conditions—irises hate wet feet.
☀️ Step 2: Provide Strategic Sun and Soil Prep
Irises demand full sun (6+ hours daily) for strong blooms, but they’ll tolerate morning sun + afternoon shade in hot climates. Amend the soil with 2-3 inches of coarse sand or grit if your native soil drains poorly—irises despise soggy roots. A slightly alkaline soil (pH 6.5-7.5) encourages vibrant blooms, so test and adjust with lime if needed.
Top-dress with 2-3 inches of mulch (like bark chips) after planting to retain moisture, but keep it 6 inches away from the rhizome crown to prevent rot. Mulch too close? You’ll smother the plant’s natural drying process.
⏰ Step 3: Feed and Prune for Next Season’s Blooms
Apply a low-nitrogen fertilizer (5-10-10) in early spring as new growth appears, then again after blooming in late spring. Too much nitrogen = lush foliage, fewer flowers. Deadhead spent blooms only after leaves yellow naturally—this ensures next year’s flower buds form properly.
Divide congested clumps every 3-4 years in early summer (after blooming). Dig up rhizomes, trim the leaves by half, and replant the healthiest sections. Weak or mushy rhizomes? Discard them—they won’t recover.
💧 Step 4: Water Deeply but Sparingly
Irises need deep watering (1 inch per week) during their active growing season (spring-fall), but no summer watering unless your region has prolonged drought. Overwatering in summer triggers fungal diseases like rhizoctonia. Let the soil dry between waterings—soggy rhizomes rot in days.
In winter, let the ground freeze naturally—irises are cold-hardy and don’t need winter watering. A 3-inch layer of mulch protects roots from extreme cold, but remove it in early spring to prevent moisture buildup.
✂️ Step 5: Watch for Bloom Cues and Adjust
Healthy irises bloom in late spring to early summer, but stress delays timing. If blooms appear too late, check for shade, overcrowding, or poor drainage. If they bloom too early, your plants may be over-fertilized or stressed from drought.
For longer bloom seasons, plant early-, mid-, and late-season varieties together. For example, Bearded irises bloom mid-season, while Siberian irises extend color into early summer. Rotate varieties every few years to keep your garden vibrant.
Tips & tricks for perfect iris bloom timing
These simple strategies will help you keep your irises blooming reliably year after year, even in challenging climates.
Planting Depth and Orientation: In Step 1, when planting those rhizomes, remember that the top should be exposed to sunlight—this prevents rot. I’ve seen gardeners bury them too deep, thinking they need more protection, but this actually suffocates the crown. The fans of leaves should face outward, never upward, to allow proper airflow and sunlight exposure.
Soil pH and Drainage: Step 2 emphasizes soil prep, and I can’t stress enough how critical this is. Irises thrive in slightly alkaline soil (pH 6.5-7.5). If your soil is too acidic, add lime before planting. For drainage, if your soil feels compacted, mix in 2-3 inches of coarse sand or grit—this mimics their natural habitat and prevents root rot, which is the #1 killer of irises.
Fertilizer Timing and Type: The instructions mention using a low-nitrogen fertilizer (5-10-10) in early spring, and I’ve learned this the hard way—too much nitrogen makes plants focus on leaves instead of blooms. After blooming in late spring, give them that second feeding, but skip any summer fertilizing. Irises go dormant in summer, and feeding then just wastes resources.
Watering Strategy: Step 4’s watering instructions are gold, but here’s the thing: in summer, even if it’s hot, resist watering unless your region is in drought. Overwatering triggers fungal diseases like rhizoctonia, which can wipe out your plants in days. Let the soil dry completely between waterings—irises are tough and can handle dry spells once established.
Pro Tips for Iris Flower Bloom Time
- These simple strategies will help you keep your irises blooming reliably year after year, even in challenging climates.
- Planting Depth and Orientation: In Step 1, when planting those rhizomes, remember that the top should be exposed to s...
- Soil pH and Drainage: Step 2 emphasizes soil prep, and I can’t stress enough how critical this is. Irises thrive in s...
Frequently asked questions
Got questions about getting the most out of your iris blooms? Here’s what gardeners ask most often—plus quick answers to keep your flowers thriving!
When do iris flowers typically bloom?
Most iris varieties bloom in late spring to early summer (April–June in the Northern Hemisphere), but timing varies by type. Bearded irises often peak in May, while Siberian and Louisiana irises may bloom slightly earlier or later. Cool-season varieties (like Dutch irises) can even bloom as early as March!
Why aren’t my irises blooming this year?
Common culprits include overcrowding (dig up and divide clumps every 3–4 years), poor sunlight (they need 6+ hours of sun dailylack of nutrients. Check for rotting rhizomes (slimy, mushy texture) or pests like iris borers. A light fertilizer in early spring can also help!
Can I force iris blooms earlier or later?
Irises are cool-season bloomers and resist forcing. However, you can prune spent blooms (but leave the leaves!) to encourage a second flush in some varieties. For late bloomers, ensure they’re planted in well-draining soil and avoid heavy summer watering, which can delay flowering.
What’s the best way to extend iris bloom time?
Choose multiple iris types with staggered bloom times (e.g., Siberian irises in May + Louisiana irises in June). Deadhead only after seed pods form (to avoid weakening the plant), and mulch lightly in fall to protect rhizomes. Pro tip: Plant in partial shade if your area gets scorching heat—it can prolong blooms!
Can I grow irises in containers?
Yes! Use large pots (12"+ diameter) with fast-draining mix (add perlite or sand). Dwarf iris varieties (like Japanese or Juno irises) thrive in containers. Place them in bright, indirect light and water sparingly—overwatering causes rhizome rot. Repot every 2–3 years to refresh the soil.
Wrapping up and next steps
Now that you know the secrets to iris flower bloom time—from their cool-season magic to the care tips that keep them thriving—you’re ready to turn your garden into a vibrant showcase! 🌸 Whether you’re a seasoned gardener or just starting, these tips will help you defy heat slumps and enjoy stunning blooms year after year.
Your next step? Plant with confidence—pick your favorite varieties, prep the soil, and watch your irises flourish! 🌱 Ready to dive deeper? Explore more blooming guides or share your progress with fellow gardeners!